Showing posts with label DIY. Show all posts

Friday, February 22, 2019

Making Friends with Your Old Photos

I'm wondering if you might not be like me -- you have boxes of photos representing decades of a life. Or, more likely, many lives.


They may be ones you took yourself, photos taken by parents of you and your siblings or their life before they met or even those taken by grandparents. Some are in albums, others scattered.

And you look at them and might have these thoughts:

Who are those people anyway?
What in the world am I going to do with them?

It can feel a little overwhelming -- and a little scary, so one step at a time!


As anyone who has tried to pull together photos for a picture board at a graduation, funeral or milestone birthday knows, it's tough to do it when you are under pressure. And these days, often a video is the preferred form of viewing and how in the world do you make that happen with this odd collection of paper memories.

I have those boxes and photo albums (my own and my parents), along with literally thousands of photos on my computer and external storage devices and I've wrestled with that issue -- trying to get them in some rightful order and to get the photos to those who might really care about them after.

Here are my tips -- feel free to add some of your own in the comments.

Rule Number One! Identify people. You may know who these folks are but as I've been doing my family history I've encountered a lot of anonymous faces that show up often. They must have been important to someone but I have no idea who they are! (Below, I can pick out four people in this group.)


A pencil marking on the back of hard copy (or a thin sharpie or specially designated photo markers) are fine. Just something to tell future generations if those are people they should care about or their great grandmother's next door neighbor's grandson playing with the family dog.

Two: Get them digitied. For the golden oldies -- two options.

The one I don't like is to take your camera or phone and photograph the piece. Sometimes this works. But you need a good camera and you need to be sure the photo is flat (lots aren't). And you if you are shooting an entire scrapbook page, you need to know how to crop. Not hard, but not the best method.

I prefer getting a scanner. A good scanner that can also do slides. The default for many scanners is 200 dpi and this is fine for most uses -- certainly the computer or smaller prints. If you are planning on making a printed book or bigger enlargement, go to the 300 resolution setting for the best outcome.


Rule Three: As technology changes, transfer the media while you can. Trust me -- if you look at a pile of old floppies you can't open containing old photos you'll cry. Everything changes. Transportation. Communication. Technology.


Think of the betamax, eight track and records. OK, I know vinyl is coming back, but the principal is the same.

One other tip. If you are going through the mechanics of doing all this, consider color correcting or brightening up the faded colors while you're at it. Your gray snow will look whiter, you may even pick up details on the photo that had faded. Many scanners have this feature. If you are looking at your regular photos, consider a program like Picassa where you can edit by color/brightness modification and crop. Some of these basic programs are free.


What's Next -- Or, How do I Find It?

So, you scan (and scan and scan). And now you have all these photos on your computer. On top of the ones from your digital camera you've already put in there. And you still can't find anything.

Everyone will have a different system but mine works pretty well. Here's how I do it, bearing in mind that I use a camera, not a phone. (The same principle would apply to phone or tablet shots, once they are downloaded.)
.
Here you can see some of the folders I use when I initially subdivide.

  • For new photos, as I download them, I name a file with the year, month and then an idea of what's in the file. For example: 2018 June -- Lizzie, Ditch, Lake
  • Then I make a file for all 2018 June and when the month is over (and you could do it before, I just don't) put all the individual files there. And then one for the year -- 2018. When the month is over, I move all the 2018 June to the 2018 file.
  • At the end of the year I have all the photos for one year in one file.
Do a junk edit -- these are things you know you don't want to save to an external.  Photos of book covers done for a reading post? Gone. Six photos of the same smiling group from a birthday party? I delete at least four and keep the best one or two.

Back up your best to an external drive or the cloud.

Then I edit. Again.  I delete things with a vengeance. I do this with everything. This edit will probably be less if you did your work well before the back-up!

And it makes a big difference to your computer. I still have to edit half of 2018 but so far I picked up 34 gigabytes of memory on my computer!

After I have saved the "Best of" on an external drive or flash, I go back through and subdivide. Flowers go into a file called "Flowers."  Family goes into "Family" and then gets subdivided ("Mom Only," "Mom and Dad," "Dad Only." The same for friends by name or group (like "Cork Poppers"). There are Travel US and Travel International and each is subdivided.

The "Family" folder

SO, when I am looking for photos for a blog post or to pull together a Shutterfly book for a friend or family, I know right where to go.

Photos Not Scanned or Otherwise on the Computer

The other ways to save and share photos are online, printed books, videos, old-time photo albums and scrapbooks.

Online: You can save the photos on the cloud. I have a google drive I use for family photos that I can share with the cousins. I also have a Shutterfly share site that has some of Rick's family things. I'm sure there are others; I just don't know them because I don't use them.

Google drive

Shutterfly folders

Printed Books: I use Shutterfly because it is what I started with but I have seen beautiful MacBooks, things from Snapfish, Blurb and other sources. These can get expensive but when they do I think about how much I used to pay for a) film b) developing c) all the bad ones you throw away after you got them back from the processor.

Shutterfly project page

Almost every year I make yearbooks for Rick and me -- an overview of friends, family, trips and such. These we actually look at because we have chosen the best of the pix and don't have to thumb through all the bad ones!


 You can even add text. Or bad poetry.


Videos: There are loads of easy ways to make video slide shows on your computer and share them with youtube.

Traditional Methods:  And sometimes you want to paste things into a book. I do. Maybe it's a beautiful handmade book or journal. If you're doing that, make sure it is a book worthy of your time and that it uses acid free paper as a background.


And if you still have photos in those magnetic page things -- pull out the good ones, dump the bad. Just get them out of there.

And when you are done -- well, if you no longer want those photos, you have a couple of options. I've used both. Toss them. Or, send them off to whomever is in them -- or knows those people -- and let them make the choice to save or toss. Half the time our friends never see all the great pix we took of them in the way-back machine and it's kind of fun to see yourself looking a whole lot better -- or at least younger -- than you are now!

Oh, here's a parting tip. We're all going to die. If you want photos shown at your memorial, choose them now. Make a folder called "funeral" and tell someone where it is and put in all your favorites. They will thank you and that really lousy photo of you in your swimming suit at the family reunion isn't going to show up -- unless you looked better than I did!


OR, make them yourself. When a friend's mom was nearing the end of her life, she began making the photo boards for the memorial so that she wouldn't have to do it in a short period during the grieving time. I have been thinking about making large collaged posters of the ones I would like for that time. I haven't done it yet because it doesn't seem too imminent. But then, we never know. And it would be so nice if Rick didn't have to worry about that.

If you've read along so far, thanks! And if you do anything -- please label!

Sharing with:   Pink Saturday     /   Let's Keep In Touch    /    Best of the Weekend    

Wednesday, December 19, 2018

Nice Christmas Things -- The Odds and Ends of Life

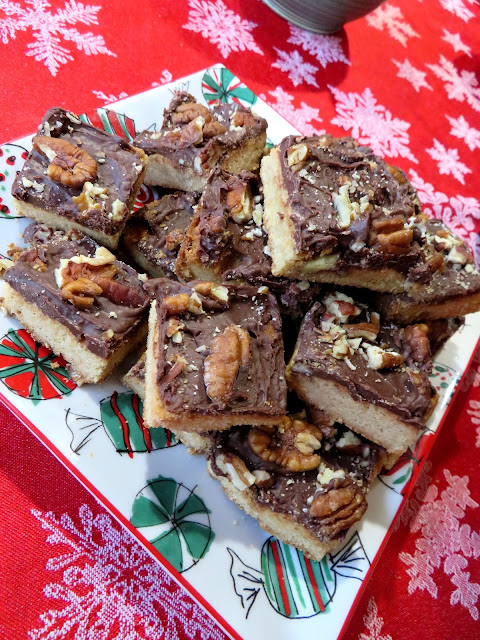
There's something rather wonderful about hearing your doorbell ring and it's the new neighbors who just moved in, bringing you cookies! (I've been wanting to put together a plate for them and hadn't finished my baking when they came! A lovely young couple. I don't think they'll be there long, but they seem so nice, I hope they stay longer than planned! They'll get some of this from me...


...and this. And something else, too. Once I bake.


Rick got his tree. It was the easiest time ever -- we walked over to the right tree, it was the right price and in 10 minutes we were home. More on that one later!


Christmas is making ornaments and crafting. And who has time to do that? I probably wouldn't have, but I had a boatload of wine corks and wanted to make ornaments for our Cork Poppers gathering. Aren't these cute? I modeled after one a friend gave me last year for Christmas, with a few changes. (Incidentally, the ones below are works in progress, before I cleaned up the moss and hot glue strings!)


You need six corks per ornament, an eye screw, hot glue gun (and loads of glue if you're making many of them), some decorative trim, moss, snow and little flowerpots. (If you can't find the mini-pots, you could always cut a cork in thirds as a trunk.) Make the tree first, by gluing three corks together. Make sure the most interesting ones are on the outside.


Then repeat with two and then one. Finally, screw in the eye screw.


Hopefully you've already painted your flower pots and they've dried. Since the corks need more to hold onto than just the rim of the pot, fill the pot with something and glue it in well. You could use clay or any filler that would give a flat top. I chose moss. (You really have to glue that in because it is sort of squishy and not necessarily all in one piece. But it's pretty.) Then attach the tree to the pot. A little vintage tinsel on the top and a dusting of "snow" and you have a cute ornament -- and for our group, a perfect one.


We gathered together to celebrate the holiday at a local restaurant, then back to Kate and Mike's house for dessert and prosecco, accompanied by a wine-and-chocolate exchange.


If you brought wine and chocolate, you swapped with another and got one to take home, so it could be either couples or individuals. (Rick and I participated individually. Two new wines to try!)


It was all holly jolly and so festive. I made toffee bars. (The neighbors will get some of those, too!)


Barb brought a miraculous flourless chocolate cake.


Kate made peppermint meltaways, lemon bars and brownies. We were not deprived!


Yum!


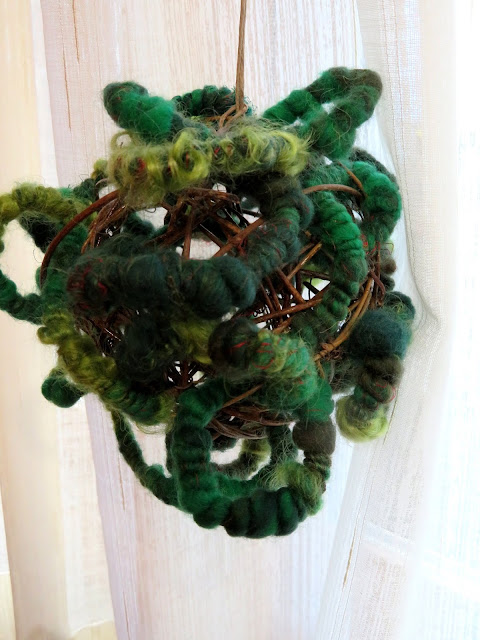
Her house was lovely. Aren't these balls unique and beautiful?


They are by a local artist and really make a statement!


Of course there was toasting!


And photos -- this is our Christmas photo of the year!


My friend Suzanne, our "honorary Cork Popper," was here for the weekend from Canada.


It was such fun and super holly-jolly!


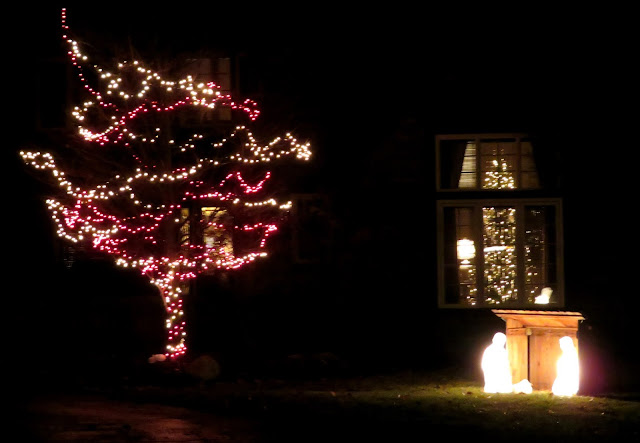
The night before, Rick, Suzanne and I did the holiday light tour, going to the neighborhood she and I grew up in. Most of the photos were terrible, but this one wasn't too bad.


When we were kids, we WERE the holiday display -- we stopped traffic in front of our house as we acted like animated dummies.


And we had such fun! Our cast rotated in size, depending on who was available and there were hot chocolate breaks when the traffic died down. We didn't think we were nerds but by today's standards, we probably were! And Mom and Dad loved having us around! It was fun trying not to "breathe" when people were watching us and let the cold-air steam escape from our lips! We even fooled people some of the time -- or so it seemed!


And of course, we had to see the state Christmas Tree.


After Corkies, some many of us went to hear Popper Roger sing in his Men of Orpheus holiday concert. Lovely to hear these deep lovely voices singing songs of the season. I, unfortunately, left the camera at Kate's!


So, I leave you today with the skies of a Michigan December.


And a little bit of holiday glow!


Merry and Bright.

(If you missed them:  Decking the Halls - The Living Room   /   Decking the Halls - The Rest of It)

Sharing this week with:   Pink Saturday     

Sunday, January 28, 2018

Altered Candy Boxes -- A DIY Tutorial

Many moons ago, I made Rick a little candy box for Valentine's Day. It was pretty cute, but I'm better now! In sore need of a crafternoon, I made up a model to share for a relatively quick project. Here's the finished piece. Let's get started!


Supplies include papers of your choice (origami and scrapbook papers are pretty!), glue stick, glue gun or other favorite glue, scissors, ribbons or lace or both, embellishments that could include cut outs, buttons, flowers, and a heart-shaped candy box. A Xyron X-box is useful but not required.


(I bought loads of candy boxes after Valentine's Day one year for about 25 or 50 cents each but I saw the small ones at Target the other day for a dollar. Size is up to you. To be honest, I think the candy in them is pretty so-so and I'd recommend filling them with M&Ms or some homemade treat!)
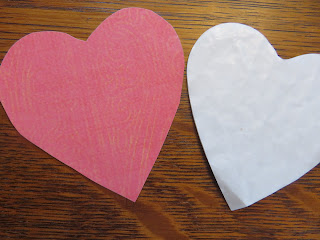
First, remove the candy or insides from the box. You can save the tray if you plan to refill it (I used M&Ms so discarded it). The paper heart can serve as a template for your inside liner.


Draw around the top and bottom of the box on your paper (I know I don't have to tell you to turn it upside down but I will on the off chance your third grader is reading this.)


Cut it out -- you don't need to be exact here. Better to make it a little large than cut too closely to the line. Glue it on with your glue stick (a dryer glue like a glue stick is better here) and then trim.


Also trace around the paper heart from inside the box and cut out the heart that will be your box liner. Glue this to the bottom of the box.


Then put your box back together. It will either have a top that closes to the bottom like this or one where the top meets the bottom half way. This determines the ribbon you will want to use on the side of your box. I was able to use a wider ribbon but you may need two pieces of one that is thinner.

I love my Xyron X-Box for ribbon. You just put it through and it comes out sticky. But if you don't have one, I would use either a very strong doublestick tape (like the red tape) or a fabric glue.


Attach the ribbon to the box. You want the ribbon to be flush to the box (that little end sticking up was glued down when I "came around.") Be extra careful when coming to the indentation around the top. Use something like a butter knife or scissor blades to be sure the ribbon attached all the way into the groove.


If you are using lace on the edges of the box, that's next. Using your glue gun, work slowly around the top and/or bottom edges of the box attaching your lace a bit at a time. Be careful around corners -- you may need to cut in and do the corners by pieces, which is easy, just annoying because it would be easier to do it in one piece.

When it's done it will look like this and that's boring! Time for the fun part.


Play around with what you want on the top. (You probably did a bit of this when you were choosing your papers initially.) Consider buttons, cut outs, even fun three-dimensional objects. I did this one kind of foo-foo but you could go streamlined with game pieces, scrabble tiles, Cracker Jack prizes, doll house bits or other things that fit your Valentine.


If you are working with a paper cut out, you might want to mount it on card stock or watercolor paper with your glue stick to ensure that it is sturdy.

 
Place them around your box to "audition" them. When you are satisfied start putting them down with your glue gun or the firm adhesive of your choice. E-6000 is good too.


I did mine in about an hour. The longest part was picking what to use. The second longest part was getting the lace around the edge of the box. Making selections is mandatory. Lace is optional! Voila!


That concludes the tutorial portion of this post! Below are images you can save and print for your own projects. Click on the photos to enlarge and right click to save on your computer.


Popular Posts