Friday, November 29, 2013

Let the Spirit Begin!

The Fa La La time of year is here!
I kicked it off with a visit to Northville and the Greens Market with my friend Jan and her mom and aunt. This is a holiday tradition for us.
I found a lovely green wreath and one of these very well made pine cone wreaths. I was happy with both.
Then we ventured into our favorite store, Gardenviews.
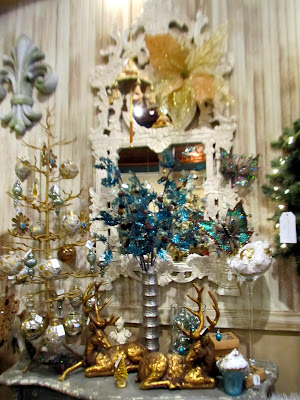
And, it looked like a fairy land.
Everything was so very beautiful -- enchanting trees...
..."Snow" covered Christmas villages...  
Fairies...
...and sprites...
And beautiful angels.
Whomever does their displays deserves and award!
We also enjoyed another store on Main Street called Pearaphanalia. I loved this table setting...
While I didn't get these pretty poinsettias, I wanted to!
The windows were, as one might expect, enchanting.
I loved this beautiful Creche.
And the elegant simplicity of these ornaments made me smile.
Yes, it's beginning to look a lot like Christmas.
Oh dear!
It's hopping along all too fast! 

Thursday, November 28, 2013

Happy Thanksgiving!

May your Thanksgiving be filled with magic!
Happy Thanksgiving to all!

Monday, November 25, 2013

Giving Thanks

This has been a huge year for us in many ways.
Many thanks are due.
Thanks to the support of so many friends, families, bloggers and even kind strangers during my health issues this spring and summer. I don't know if I'm out of the woods yet, but I like to think I am, at least for awhile. I'm sure the support and prayers I received helped tremendously. (Below -- last February.)
Thanks to Rick for all that, for sharing Greg and Kevin with me, and for so much more -- he has become a bread baker. My hips gladly pay the price as I devour all his experiments and successes!
Thanks for wonderful classes at SmittenDust with some of the finest teachers one could imagine. I've learned so much and had such fun.
Thanks for Lizzie helping me move through my grief in losing Gypsy last year. Lizzie will never be Gypsy. She will be Lizzie -- and that's OK.
Thanks for 32-plus years at WKAR and now many more to come as a most joyful and elated retired person. I hope many of my WKAR colleagues will soon know that joy!
With that comes thanks for time. Time for art camp at the lake...
Time to read and enjoy my book club more because I've actually read the book!
Time to take walks at the ditch and hang out with
Harry the Heron!
Time to celebrate all for which I give thanks.
Have a safe and happy Thanksgiving.

Tuesday, November 19, 2013

Gelli Jam with Kari McKnight Holbrook

If you are reading this post to learn all about gelli printing, you will be sorely disappointed! Patty can tell you much more and show you far better examples! 
Gelli printing is messy and tons of fun. I'd never tried it before, but after my gelli printing class with Kari McKnight Holbrook at SmittenDust, I can see why she loves doing it so much. (This is one of Kari's papers below!)
Gelli printing is essentially making monoprints on a plate made of gelatin (if you do it yourself) or what I suspect is some kind of silicone (if you buy a ready-made gelli plate).
Your supplies include paint -- relatively inexpensive acrylic paint is recommended. Yes, you can use your Golden fluids, but at $1.59 for a bottle of decent craft paint versus $5.99 and more for Golden, this heavy-on-the-paint technique works fine with the less expensive brands.
Your other supplies include a soft paint-spreading brayer and various items you can use for texture and pattern. These include stamps, cheesecloth, rubber bands, string, bubble wrap. You get the idea.
I'm oversimplifying this but basically, you mix your paint on a freezer paper palette (that's a Kari tip that some of you may already know and do. The shiny side of the freezer paper is easy to work with and inexpenive). Plus, when you are done, you can tear it up and use it!
Then bray it directly onto your printing plate.
Lay items on the painted plate for texture and design interest.
Then cover them with your paper and press to transfer the color and design to your paper.
Doing a second "ghost" print after allows you an even different look at what you just did.
When you have a bunch of papers (and you can use about any kind of paper), you can reprint over them with different colors and designs for extremely complicated patterns, like that first photo of Kari's.
There are other techniques, too, and as I said -- I am not the person to share them, for I am just learning.
The good thing about the class is that we are all learning. And we all learn from each other, too -- sharing stamps and stencils along with the supplies generously provided by Kari.
But I thought you might like to see a few of my cards showing how to use the papers. This one is pretty simple, done with a stamp.
I used one with a tree stamp as the background for this Christmas card.
 
And here are two using various papers highlighting my favorite spot! this one used some of the purples from the above tree...
And this one had more peach tones. (The purple on this one below is from a purchased paper.)
 
So, save all your oddly shaped, interestingly patterned flat things and give it a try!
Thanks to Kari's typically excellent instruction, this one was a great workshop -- and this is a technique I will be using over and over again! (Visit Patty for more inspiration on gelli printing -- just use her search tab to find her posts!)
Friday, November 15, 2013

Angels with Kari McKnight Holbrook

Anytime I can take a class with Kari McKnight Holbrook, I jump at the chance. Last week she was visiting SmittenDust, our local art haven, teaching several classes. I was able to sign up for two. The first involved making a polymer angel canvas. These are Kari's.
Kari is an excellent teacher -- first of all, she explains well.
She brings lots of supplies to share.
And she shows us how to use them. And makes sure we know how!
All of this she does with great good humor, which always makes a workshop more fun. And she is ready, willing and able to give assistance when needed.
We all started with a basic shape template of an angel to fit in a 5x7 canvas. We learned about conditioning the polymer clay and spent a good deal of time at the pasta machine mixing colors till they were "just right." Basically, she turned us loose and let us fly.
These are several stages of my angel. First, just the clay on a worksheet.
Then with more details.
Then baked and wiped with a sepia glaze that brings out the texture.
Finally, the finished piece with its creator. You can't tell from this but after the photo above, I added coppery gold to her wings.
What was fun was that even though we all chose the same basic template for our angels, they all were very different. This is Dusty's. (Dusty is also Ms. SmittenDust!)
Here, Linda is adding touches to her angel's dress.
 
And this is Amy's as it went into the oven -- we loved her dreadlock pony tail!
 
I'm not terribly familiar with polymer. I've made a few things before -- mostly beads or covering boxes (that was in another Kari class!). This was a terrific experience and I ended up with a project that I like. (And will like a little more when I perk up the mouth and eyes!)
All in all, I'd say if you have a yen to try something new and creative and Kari comes to your town (she also does a number of the national events, including Art and Soul and Create), 
sign up!
Next time I'll show you the fun of gelli printing!

Popular Posts