

But we decided to up the game. Our guests would meet first for a crafty project -- something that could be done in a couple of hours, something that would be more or less finished by that time and something where everyone's would be unique.
Barb found a twig hanging on the blog Design, Dining and Diapers. After creating a couple of samples (and being convinced that it could be taught in the time allowed, we chose that project. Lunch, an English tea, would follow.
 |
| Barb's sample |
This is part one of a two-part post -- the Making. The Tea post will appear as part of Vanessa's annual Mad Hatter Tea Party and post on July 11.

We started out with piles of twigs/branches. The secret to this (and you can find complete directions at the original link) is to 1) determine the size you want your wreath and its orientation (vertical, horizontal or square) 2) determine if it is to be indoor or outdoor 3) decide its purpose (a welcome, a simple hanging, a photo frame, etc.)
 |
| Jeanie's sample photo frame |
Then cut the twigs -- we used red dogwood, since Barb had tons of it, but it could be any interesting not-too-thick branch.

The main thing to consider is that the twigs much be about two inches longer on each end to allow for connecting with the twine or string that will hold it into shape. For example, for my photo frame, the mat was 8x10. My twigs had to be 10x12.

It helps to bundle them with a rubber band to hold them together as you wrap the sides in a criss-cross. (Tie a knot on the back with a long piece of twine, then wrap diagonally for a bit and do the reverse diagonal.) If you screw up and mix up back and front, never mind. That's what glue guns are for. (The rubber bands keep the twigs from "branching out," so to speak -- and from your twine getting caught up in them like a spider web!)

Once you get everything lined up into the proper shape, then you're ready to connect them.
 |
| Getting everything positioned well helps make the wreath look more professional! |
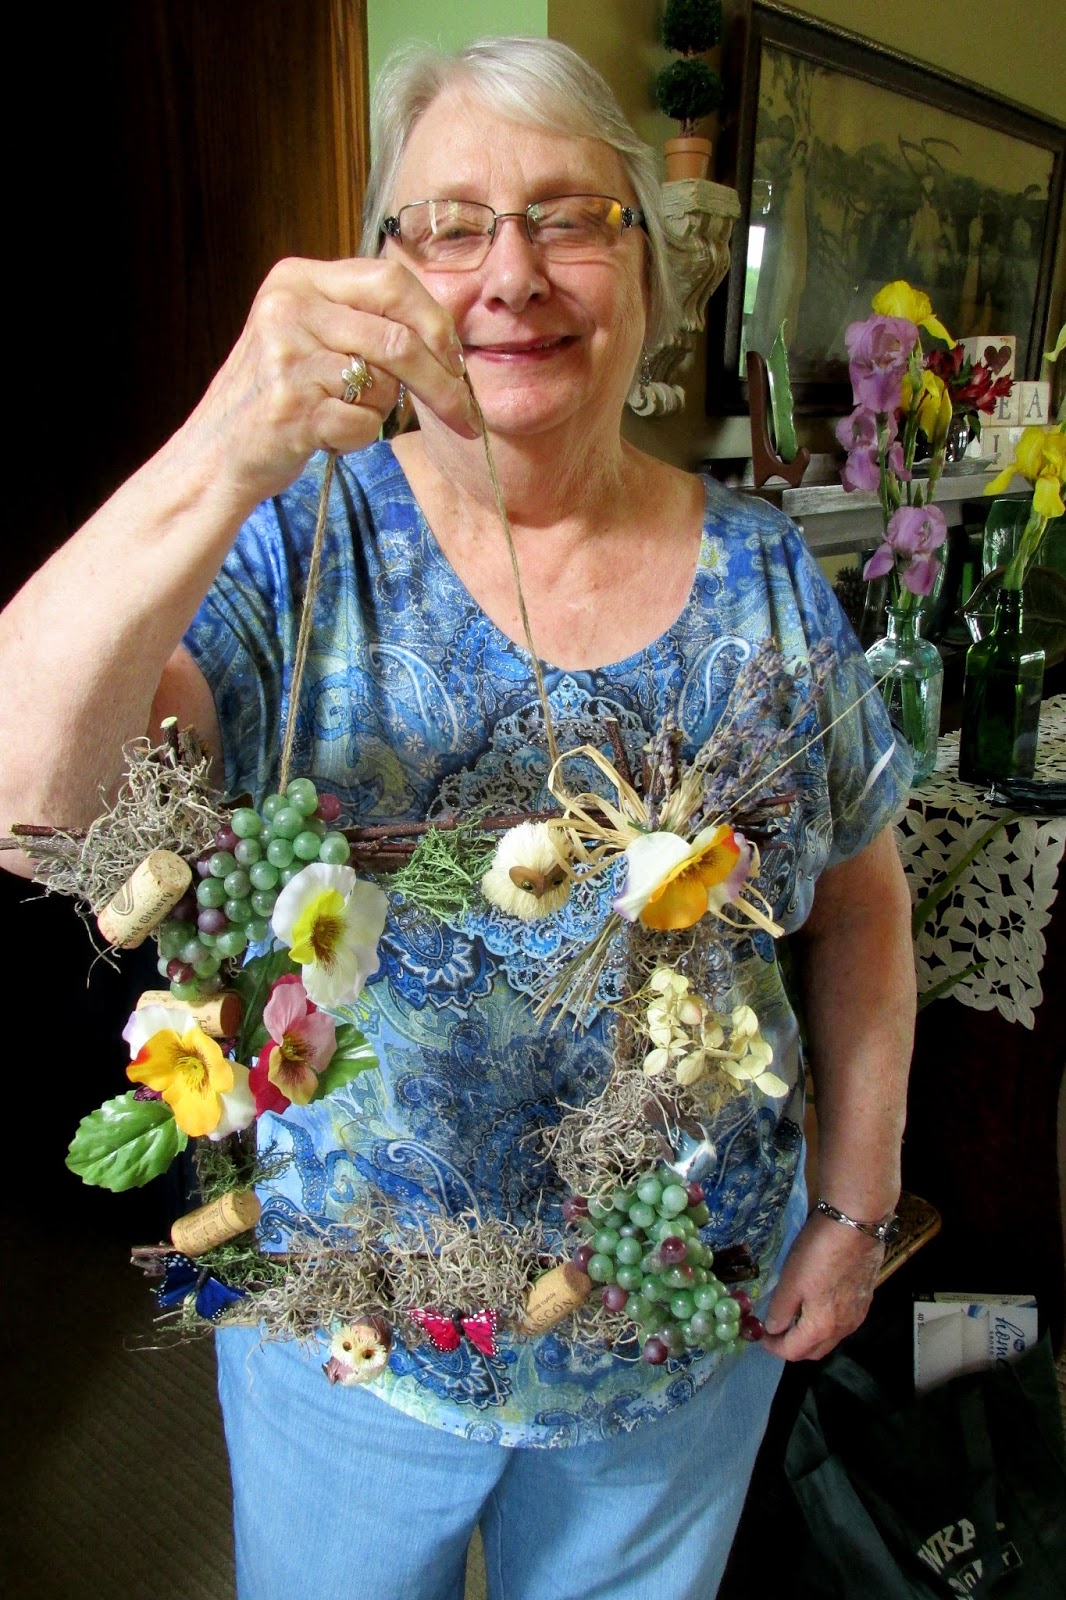
Once it's together, start choosing your embellishments and glue to your heart's content. This is where every hanging becomes different. Pat had a wine theme, with grapes and corks. Jan decided to use hers as a "lost and lonely jewelry display" hanging. Lots of us used moss and even dried hydrangeas, like Jane's.


Julie, a gardener, reflected the natural world in hers. Kate decided to create a photo frame and finish it off at home. Anne also reflected the natural world of the garden.


Mine was sort of a springy, gardeny mix!

Many of us used a bird's nest which Barb showed us how to make. I'll give instructions for that in a future post.
 |
| One of Barb's mossy nests |
Some used paper clay eggs tinted to the chosen color. (I put a terra cotta star in mine.)
 |
| Julie painted paper clay eggs blue for her nest. |
The joys of this were numerous. This particular project was great for people that really aren't into crafts since it can be so original and unique.


And it has purpose. Don't you hate doing a project you may never have use for?


And, the set-up brought about camaraderie. Some of our guests knew each other, but no one knew everyone. By the end of the day, they were talking like old friends. We gave the guests plenty of room (no more than three at a table, since the branches were a bit unruly to start) and then set up stations for hot glue, paper embellishments and other embellishments like lavender, moss, birds, butterflies and eggs.


If you are hosting, our hints!
- Use dollar store plastic table cloths that you can easily wrap up all the loose twigs and bits for fast clean-up.
- Consider old books, encyclopedias and the ever-popular printer for words to tuck in.
- Feel free to tuck in branches and bits after you are glued together for a wilder, more rustic look.
- The Dollar Store may well have the best deal on Spanish Moss ever. (Dollar Tree) Reindeer moss is fun, too.
- If possible, do on an easy-sweep surface. We were on carpet in the basement and it's OK and much more comfy but the clean-up is a bit more difficult unless your vacuum is into twigs.
- If hosting a group, suggest that if possible guests bring clippers, which is easier for everyone. But have extras.
- Also, with a group, having two or three gluing stations is useful as well as stations for your embellishments or paper. This lets people work at their own pace and avoid too many people around too small a space.

A successful project, lots of smiles. Then it was on to lunch -- but you'll have to wait a few posts for that one!


26 comments:
It looks like everyone had a great time.
Such a good time...and some adorable items made. Love this post.
My daughter, 2 grandgirls and I spent a really fun afternoon at our local pottery painting place called The Clay Cafe last week. I have NO talents at all and they all are so good at it. The pieces are being fired and when they are ready, I'll have a post.
I am working on my Mad Hatter for July. I sure hope I don't get all into it and hit PUBLISH before I'm ready. lol
You and your friends always make the "funnist" projects. Love the twig frames.
Oh what a fun event! I love that not everyone knew each other but were talking like old friends by the end of the event. And your creations are beautiful. I bet everyone had a blast and felt so lucky to be included! I'm looking forward to reading about the tea!!
These are beautiful frames from nature indeed, Jeanie! And your own framed owl photo is lovely! Like the owl is right in his neck of the woods, rustic, natural. You know, I've your owl photos stored in my computer. They have wonderful angles and details. Even though I'm not hosting, I like your hints. They are tidbits of how to do things efficiently, how to be prepared and work smart. Great hints for anything really.
You got the creative juices going - again. Just need to find some twigs. Maybe time to trim a crepe myrtle, but I hate to do it before they bloom. Oh, well, patience!?!
You are so often involved wih such interesting gatherings! The project you chose here appeals so much to me. I love natural elements and gathering bits of nature. I know my grandgirls would love a project like this too. The samples are so beautiful. I'm sure the tea will be too! I really enjoy your comments! Thanks so much!
These are all so creative. What a fun day, and it sure looks like everyone had a fun time😃
Sounds like another really fun project!
Yes... I always prefer it when I have a use for the things I make.
Vanessa is still doing her mad hatter tea parties? I remember joining in with one a couple of years ago... It was great fun!
WAIT....how did I miss this???????? This is great! Jeanie, thank you for coming to visit me! Yes, I am back, but apparently, I missed this post! HAHAHAHAHAHHAH....go figure.
Well my friend, you are on the move with some great projects here! Me too. But first, summer vacation in coming for us and we are going to take a little trip. I can't wait to get there and seize as much out of it as possible.
Enjoy your weekend! Anita
You're so wonderfully creative, Jeannie! I never stop being amazed!
What a great idea! It looks like everyone had fun. And they came out so well!
How pretty the final product is. You are always involved in something fun, and I love how you share it.
these are all so charming. Such a wonderful way to spend time with people, making artful items.
What a brilliant day it must have been, such fun!
I love that no matter how similar, they are all different and unique. Good for you to have a communal craft event! Looks like fun.
Well this looked like it was a wonderful time had by all!
All of that unique creativity.
It is always such fun to begin with similar ingredients and see where everyone's imagination takes them.
I so enjoy working with natural ingredients.
Thank you for sharing this special day with us.
oxo
Love the frames
Would like to make one too.
Laura
This looks like fun, Jeanie - I like how hard everyone is concentrating and their smiles holding the finished products! I've missed your blog - too busy gardening!
Jeanie, you have so many friends and so many activities. I wish I lived closer to you. You're always having and making fun with others. It's a great way to be.
Jeanie, it looks like everyone enjoyed this. You are always having fun or making fun for others. It's a great way to be. I wish I lived closer.
How fun! Love it, they all look so great. I am also loving the smiling faces. Good job ladies!
Jeanie,
Perfect Spring activity with some lovely ladies.
I just love how this project turned out!
I am so happy that you shared it with us today.
Thank you so very much for joining us at Thoughts Of Home Thursday!
jemma
So pretty! I adore how each lady made it her own. Thank you ever so much for linking up at Thoughts of Home on Thursday. Your presence adds such a ray of sunshine!
I think it would be so much fun to get together with friends and make these. Thanks for the inspiration and for joining Thoughts of Home on Thursday. I'm pinning. :)
What a fun day and what creative efforts!
Thank you for sharing this with all of us at Thoughts of home on Thursday.
Post a Comment