
I love Claudine Hellmuth's work and enjoyed an online class with her last year. (I had less time than I thought to put into the work, but I still learned a lot!) So, when I saw her freebie tutorial for a paper bird's nest in my email box, I decided I had to give it a go.

If you click on Claudine's link, you see this nice full nest into which she put pretty eggs.Mine is a little different. Here are a few of the pitfalls I noticed. Nothing major, but worth keeping in mind if you try this!
First, Claudine says cut up brown paper bags and text for the paper bits. Then you glue them over the back of a protected bowl to make your nest. (I'm giving vague instructions because I want you to visit her!)

So I did. Note to self. It is best to use the paper bags. I had some cool brown shred which I thought would look all nest-like and it does. But it was a pain to work with.

Note 2. Use enough paper. My nest is pretty thin and I think it suffers for it. If you look at mine and then Claudine's, you'll see how hers is fuller and probably stronger. More layers.
Note 3. This takes a lot more matte medium than you think it will. Just be prepared.

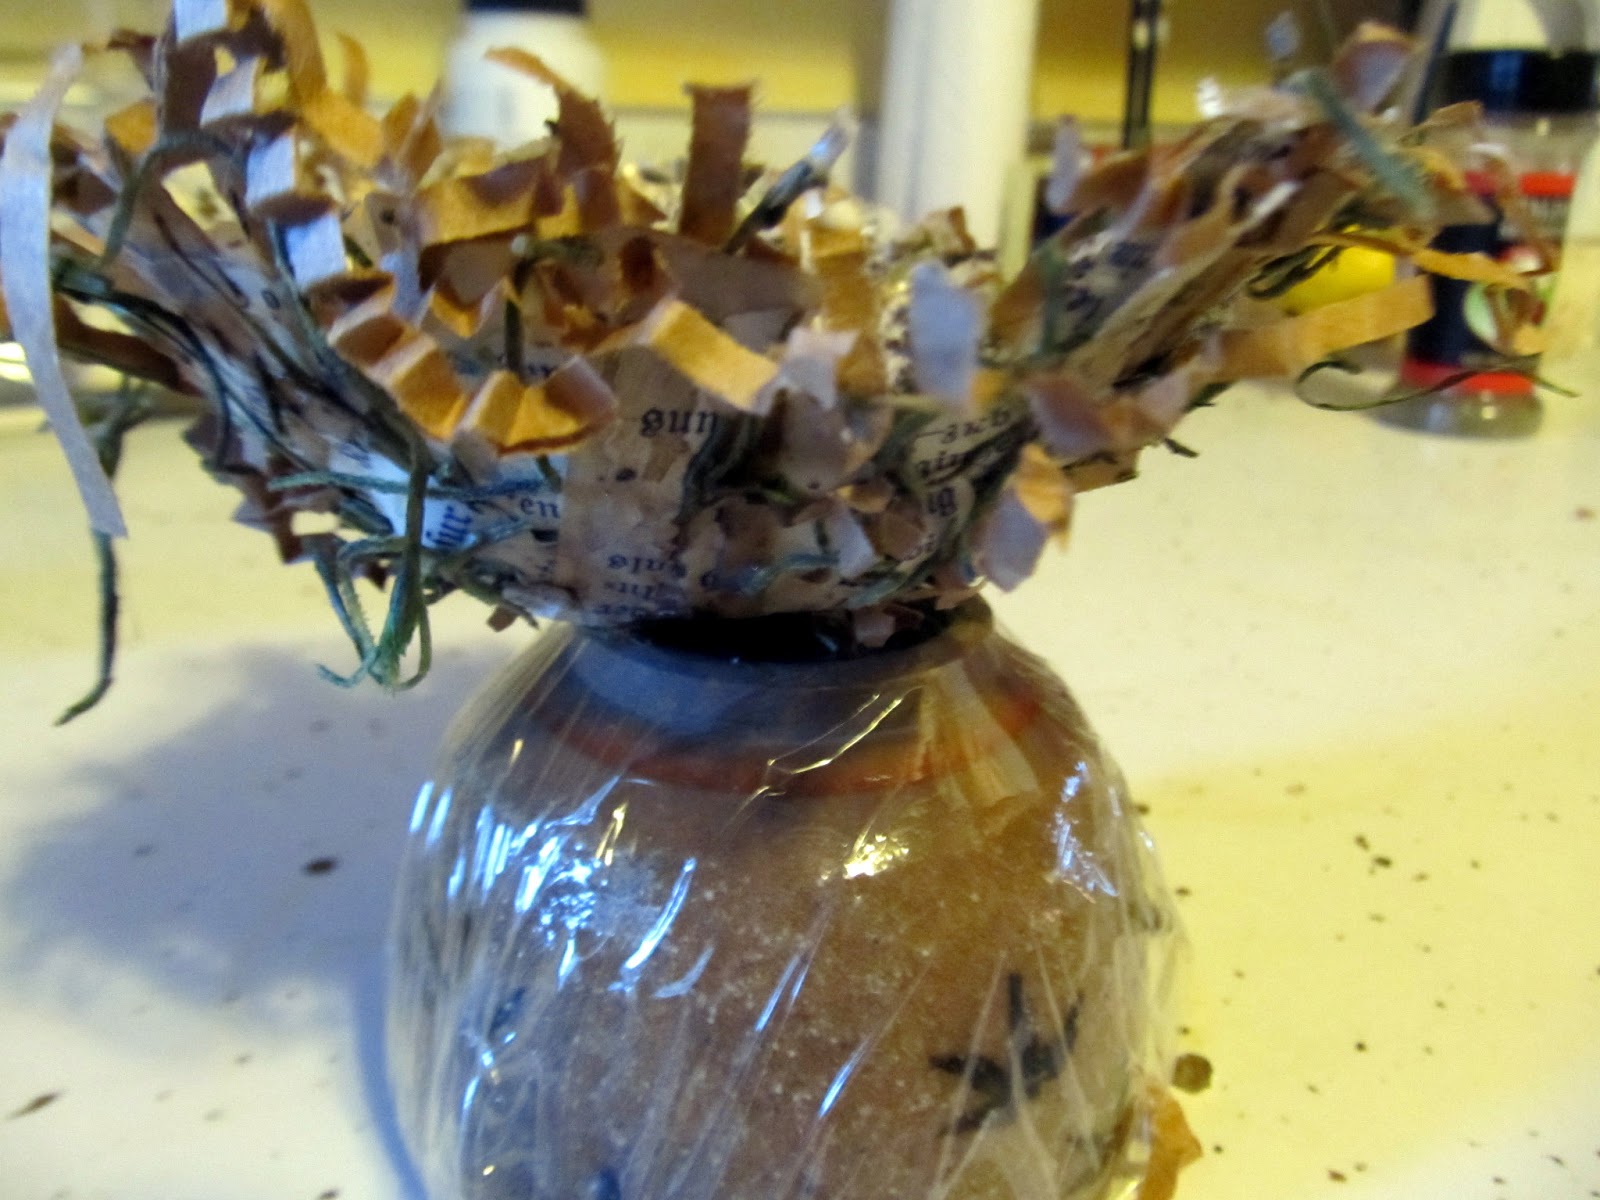
Note 4. Make sure you use more brown than white. Otherwise it looks like the photo above, which isn't too "nesty."

Note 5. Other materials can help. I used a little green moss to darken things up and I also added a thin layer of medium to the inside of the nest and sprinkled oregano gently within. It helped.
Note 6. I still wasn't thrilled by the white look so I did a thin raw umber wash. You can see it a bit in the above photo. It helped. A lot.

Note 7. Fill can help all around. I added a few feathers, some inside moss and ...

Voila! I was very happy!

These are delicate and I suspect mine is more so because I didn't use enough layers of paper. But it's pretty darned cute and I'm sure I will make another! Thanks, Claudine!
Note: I have just updated my book blog, Chopsticks and String, so if you're looking for a good read (or one to ignore), stop by!
Note: I have just updated my book blog, Chopsticks and String, so if you're looking for a good read (or one to ignore), stop by!


20 comments:
It has been fun seeing different versions of Claudine's nest...
yours is lovely Jeanie ...
the feathers are a nice soft touch... I still want to give it a whirl ... so far I have my shredded paper ready ;)
oxo
I like the way you used your creative skill by starting with her instructions but making it very much your own creation.
Your nest is charming and lovely. You should be very proud of yourself.
Your nest is darling! Good job!!!
Jeanie,
Your nest is so beautiful.
I like your tutorial. I made one Last Year too with Branchen, Feathers and a vintage collage baby inside.
Last year I found a after a storm a real nest in my garden and used it for outdoor decoration with false birds from metal. Unfortunately it was lost after another storm one day....:(
Hugs
Stefanie
This is such a cute idea! I like your nest with the eggs and feathers. It looks very organic and natural.
Nicely done - I'm going to check out that freebie tutorial!
Love it and I will check out the link. This is a great project for spring!!
Enjoy the rest of your week!
Leann
Oh I just love your birdnest. I think it is beautiful! How fun to make.
So cool. Off to visit your book blog, too.
h Jeanie, I love it! You have created a beautiful birdnest.
Thank you for your sweet words about Ruby.. I would love to try my hand at another kitten.
WOW...wow...wow...the nest is GORGEOUS, Jeanie! I just love this. I will have to have a go at this. I wonder if I will have the patience to glue all those layers? ;o) LOL... Thank you for the tutorial link. Happy Day ((HUGS))
What a fun project! I really like the addition of moss and feathers - and the finished product is marvelous.
I'm especially interested in those eggs. Did you make them? I have some real nests I've collected, and that kind of egg would look wonderful in one. So many I see just look fake, but yours certainly don't.
I will go have a look at hers, but I agree, yours is pretty darn cute! Bravo.
V
it looks fabulous!!!!
It's so cute. I think the addition of moss and feathers was a good idea. I will have to follow the link and check it out.
This is just as cute as can be! You did a great job.
Thank you for popping over to see me.
Be a sweetie,
Shelia ;)
I had noticed the moss disappearing off my front porch that was covering a pot of pansies. Then I saw the phoebe birds building a nest up under our tall deck and lo and behold there was the moss, all nicely worked into their sweet nest. :) Your nest is adorable. I love the feathers. I tried making one of those last year. I didn't do too well...LOL.....
You know how much I love paper, so of course I love this.
:)
Well I think yours is lovely as well! I love the use of the feathers!!
Post a Comment